

Interviewing as a Tool for Folklore, Oral History, and Community-Based Research
Interviewing is a powerful tool for educators. Through interviews with people in their families and local neighborhoods, students make connections between what they are learning in school and informal learning in their homes and communities. They hear personal stories that bring family and local history to life. They engage with stories that reveal how larger historical events and social movements have affected their own communities. Interviewing builds skills, knowledge, and enduring understandings that will serve students throughout their lives.
At City Lore, the New York City-based nonprofit where I direct the Education Program, interviewing is an essential tool we use in our in-school and out-of-school programs. Students interview family members and community residents in their homes and workplaces and in the classroom. To identify potential community guests, we rely on our own contacts and on the suggestions of school staff and families. Often, we just hit the streets and visit local businesses and organizations, which is a wonderful way to learn about the school’s local community.
City Lore’s teaching artists emphasize the ways they conduct their research to gather ideas, materials, and resources for art making. In addition, they use interviews conducted by the students as source material for art making in our K–12 school partnerships. Examples of these projects include student interviews with community activists for a spoken-word poetry project; immigrants for songwriting and picture book projects; and Madeleine Sugimoto, whose family was sent to an internment camp during World War II, for a play on Japanese American history.
City Lore’s staff uses the guidelines below to prepare our teaching artists and classroom teachers for student interviews with community guests. We adapt the guidelines to the age of our students, and invite users of this guide to do the same.
~ Amanda Dargan

Why Use Interviews and Oral History
Interviews and Oral Histories Provide:
- Accounts of events, either historical or contemporary, through the eyes of people who played a role in or who witnessed those events.
- Insights into the perspectives and knowledge of people who participated or observed but who are not considered authorities and therefore are often excluded from history books and media accounts.
- Multiple points of view on events and shared experiences, not just established opinions or histories told from one group’s point of view. What people believe influences what they do and how they interpret events even when information differs from other historical records–so this is important to record, too.
- Rich primary source material, with perspectives and stories that can enliven the topic of study and show how larger social issues and events have affected local communities and individuals.
- Opportunities to learn more about people we see every day, including family members.
- Practice using critical thinking skills, including close observation and listening, making connections, analyzing, inferring, interpreting, synthesizing, evaluating, and retelling.

Students observe Samantha Mukkavilli making rangoli designs next to her home before interviewing her about the tradition, how she learned, and the role it plays in her life.
Preparing to Interview
- Think about the purpose of your interview. Ask yourself, “What do I want to learn from the interview?” “Whose perspectives, knowledge, and experiences do I need to include?” “What is the purpose of the interview?” and “How will I use the material?”
- Do background research on the topic and the person you plan to interview beforehand so that you can ask informed questions.
- Prepare a list of topics and focused questions from your research to use as a guide. If you will be drawing on the interview to produce one or more products (such as an essay, radio program, podcast, exhibit, visual arts project, song writing, play, etc.) keep in mind the kind of information you will need as you prepare your questions.
- If possible, talk to the people you plan to interview beforehand. Describe your topic, why you chose them to interview, what you plan to do with the interview, and who will have access to it. Giving them a few days to think about the topic may result in a richer interview. Assure them that you’re interested in their personal experiences and memories; therefore, they do not need to conduct research on the topic in advance.
- Make a technology plan. Choose the appropriate audio, video, or notetaking technology carefully, considering the ways that you would like to use the material. If you plan to record the interview, test your equipment before you go and make sure that you’re comfortable with the set-up and controls. If needed, bring chargers, extra charged batteries, and memory cards. Decide if you need images (photos or video) in addition to audio.
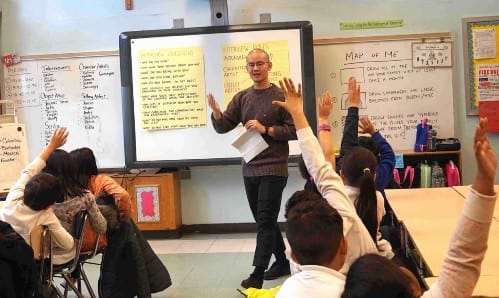
- When working with a team, discuss roles and responsibilities, such as Interviewer, Note Taker, and Equipment Operator. Always give all team members an opportunity to ask questions before the close of the interview. Karl Orozco, a visual teaching artist with City Lore, divides classrooms into five roles for their interviews with community guests: Interviewers, Scribes, Character Artists, Setting Artists, and Object Artists. His approach encourages collaboration and ensures that every student has an important role in the interview process. [See Classroom Connection: Creating Art from Interviews]
Teaching artist Karl Orozco preparing his students for their interviews with a community guest who came to the United States as an immigrant.
Conducting the Interview
Deep Listening
Deep listening is the most important skill for conducting an interview. Good interviewers listen closely to the narrator’s responses and do the following:
- Demonstrate active, attentive listening. Show that you’re listening by making eye contact, nodding, using facial expressions to respond to what you’re hearing, and asking follow-up questions.
- Give the narrator and yourself time to pause, think, and reflect. Inexperienced interviewers often rush to the next question when there is a long pause, which can give the impression that you’re interested in only short answers. Also, people often pause before describing a powerful experience, so you may miss the best stories if you don’t give them time to gather their thoughts.
- Ask follow-up questions to clarify or probe more deeply into a topic or to ask for more details or examples.
- Take notes (even if you are recording the interview) on the setting, the people, and other things you observe that may not be captured in a film or audio recording. Record your observations and write down questions you have based upon what you are hearing. Some interviewers find it helpful to divide their notetaking page into two columns, one column for notes on what you hear in the interview and a second column for questions you may want to ask later, issues or topics the interview raises, or things you notice about the setting.
Asking Questions
An interview should feel like a conversation, even though the interviewer does most of the listening and the person being interviewed does most of the talking. The job of the interviewer is to put the narrator at ease, listen actively and respectfully to what the narrator says, and ask questions that elicit rich details, stories, and perspectives on the topic you are researching.
Two types of questions, close-ended and open-ended, are essential to a good interview, but try to make most of your questions open-ended.
- Close-ended questions elicit “yes” or “no” and short answers that help you gather basic information. These questions often begin with the words:
-
- WHAT (is the name of the town where you were born?)
- WHERE (were you stationed during the war?)
- WHEN (did you family come to the United States?)
- YES/NO (DID your family enter the United States through Ellis Island?)
- Open-ended questions give the narrator a chance to talk at length on a topic. Devote more time to open-ended questions, which often begin with words and phrases such as:
-
- TELL ME ABOUT (your experiences working in the mine.)
- WHAT WAS IT LIKE (living on the Lower East Side at that time?)
- DESCRIBE (a typical day of work on the farm.)
- EXPLAIN (how you shear a sheep.)
- HOW (did you feel leaving your family behind?)
- WHY (did you decide to leave your home?)

Students gather around Montse Olmos Tlalcihuatzin after their interview with her. Said one student, “Montse’s story is also my story.”
Other Interview Tips
- Talk with your narrators beforehand and tell them why you want to interview them, how you plan to use the interview, and who will have access to it. When working with K-12 students, the classroom teacher or teaching artist can call the guest and describe the project, then ask the guest to consider demonstrating what they do or telling the students about themselves briefly before the questioning begins.
- Arrange to record the interview in a quiet place with very little background noise or distractions. Do a brief sound check before you start and listen through your earphones to ensure that background sounds are not distracting from the interview. Sounds such as those from a fan or air conditioner will sound louder on the recording than you may perceive them. Don’t hesitate to ask the person to turn them off during the interview, and be sure to remind them to turn them back on when the interview is complete. If you’re recording the interview for radio or for podcast you may also want to record sounds from the narrator’s home or workplace.
- Avoid asking leading questions. Ask questions that encourage the narrator to answer in a way that reflects their thinking, not your thinking. For example, instead of asking, “Don’t you think it was wrong to close the factory?” ask, “How did you feel about the decision to close the factory?”
- Ask for specific examples and stories to illustrate the points your narrator makes. For example, if the narrator says, “We used to get in trouble for playing games in the alley,” you could ask, “Can you tell me about a time when you got in trouble?”
- Ask for detailed descriptions of people, places, and events or describe them yourself as part of the interview. As Radio Diaries producer Joe Richman says, “Be the listeners’ eyes and ears.”
- Use your list of prepared topics and questions as a guide, but be flexible and respond to what the narrator says and explore different topics that come up during the interview. If the narrator starts to talk about subjects that seem irrelevant to your topic, politely move back to the topic with a new question but also remain open to the possibility that the divergence could become interesting and useful. We try to go over our list of questions beforehand but put them aside until the interview is almost complete, then check our list to see if we’ve forgotten anything.
- Be willing to share some of your own experiences. If your subject seems reticent about sharing personal stories, one strategy is to share your own personal experiences similar to those you are trying to elicit. Respect the fact that there are some topics that your subject simply may not want to share.
- Ask your narrators to sign a release giving you permission to use the material and outlining what you will do with it. Get contact information in case you decide to use selections from the interview for other purposes later.
- Create a plan for storing the interviews and documentation that students create based on the interviews. Post-secondary educators and students may have access to an archive for storing copies of interviews and related materials. K–12 educators can ask their school librarian or a local library to create a file for their interview materials. It is also important to offer the people you interviewed copies of the interviews and of the final products. A colleague described a recent call from a woman who asked for a copy of an interview he had done many years ago with her grandfather. “I’ve never heard my grandfather’s voice,” she explained.
Interviewing Etiquette
- Be polite and respectful of your narrator’s time and energy by arriving prepared and on time and ending the interview at the scheduled time, unless the narrator wants to continue. You can request a second interview if you need more time. Interviews over an hour long can be a strain on the subjects.
- Think of your interview as having a beginning, a middle, and an end.
-
- Before the interview, talk informally to help both you and the narrator relax, establish rapport, and feel comfortable sharing personal information. Explain your topic and how you plan to use the information (even if you have done this previously).
- Begin with questions that are not too personal or challenging. This gives the narrator time to get to know you, understand what you want to learn, and decide if they trust you enough to share personal information.
- Move to more open-ended questions and questions that probe more deeply into your topic and your interviewee’s personal experiences.
- When you have finished, ask, “Is there anything you would like to add?”
- Thank your narrator before leaving and ask if you can call for additional information after you have had time to look at your notes. Follow up with a thank-you note and offer to share a copy of the recording or photographs.
After the Interview
- Copy and label your recording file. Make a copy of all digital files from the interview and save in a safe place like a classroom cloud storage site or a hard drive. Label your recording file soon after the interview and make sure the file data includes the names of interviewer and narrators, date, place, and other information relevant to your topic. Use the same file name for other forms of documentation from the same interview, such as photographs, notes, sketches, and artifacts.
- Listen to the recording and make a list of the key topics. Transcribe the interview, or outline the interview and transcribe interesting quotes and information that you may want to use in your final project. Make sure this document includes the file name so that it can be traced back to the right digital file.
- Analyze your notes. Look for evidence of the narrator’s point of view, thematic connections between different parts of the narrative, interesting quotes, and connections between the narrator’s personal story and larger historical narratives.
- Contrast and compare the perspective and experiences of this narrator to others you have interviewed on the same topic and to written records. This will help you see how unique or broadly representative this narrator’s experiences and perspectives are.
- Treat the evidence with care. Apply the same standards for citation and use of oral history materials as you would with other types of historical evidence. You have a responsibility to present your narrators’ points of view and the context in which they were expressed accurately.
- Be careful that one story does not become the only story. One person’s perspective should not be generalized to an entire group or community. One moment described in an interview should not be understood as that person’s only story or full story.
- Reflect on what you, the interviewer, bring to the interview and how that might shape the questions you ask, the topics you explore, and your interpretation of the interview. In their book Fieldworking: Reading and Writing Research (2011) authors Bonnie S. Sunstein and Elizabeth Chiseri-Strater suggest three questions to ask yourself when you’re conducting fieldwork, including interviewing: What surprised me? (This tells you what you didn’t know or thought you knew), What disturbed me? (This tells you what challenged your deeply held beliefs), and What intrigued me? (This tells you how your personal interests influence the questions you ask and the topics you explore more deeply).
Find Classroom Connections with activities and lessons here.
All Photos by Amanda Dargan.
Work Cited
Sunstein, Bonnie S. and Elizabeth Chiseri-Strater. 2011. Fieldworking: Reading and Writing Research. 4th Ed. New York: Bedford/St. Martin’s.
URL
Radio Diaries: https://radiopublic.com/RadioDiaries